| |
|
|
|
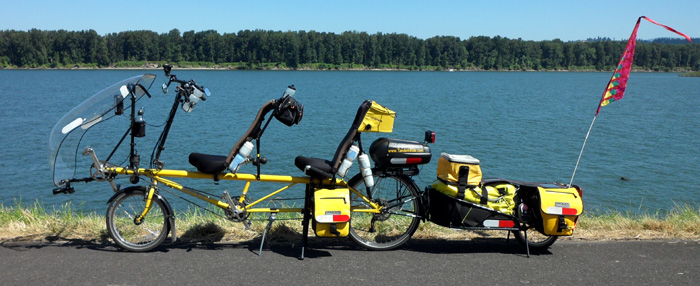
In order to get ready for
touring, we needed to
really expand our cargo carrying capabilities.
When we got it all decked out, it looked like we needed
a caution sign on the back! In fact we have had people
kiddingly ask us if we need a special license to
ride it.
The items below are what we have added to our
rig. |
 |
 |
| |
|
Performance Disclaimer...
Before going any further, I should say a few
things about what all this extra
equipment does to the handling of the bike.
It most definitely changes things. I'm
glad that I had a great many miles of experience
on the bike before I loaded it down in this
manner. The total added weight of the
panniers, trailer, camping and personal gear is
around 100 pounds. When you're on flat
ground at "cruising speed" you forget
the trailer is there. It handles very
well. However, there are times when it
feels quite different. Right off the bat
you notice how much harder you have to work to
get it rolling from a standing stop. The
biggest difference is climbing hills! You
are a few gears lower and a few miles per hour
slower than with the bike alone. The most
challenging thing for me is maintaining my
balance under 5mph on long steep hills. I
am not complaining, we love touring! I am
making these comments as more of an "honest
disclaimer" to anyone reading this who may be
considering touring themselves. When you
make the decision to tour, you just need to know
going in that it involves more work than riding
the bike by itself. You need to approach
it with a different mindset, or it could be
discouraging. We share the best wisdom
that we have found regarding starting touring on
our Touring Tips
page. |
|
|
|
|
Map Bag |
|
We added this bag with a map holder on the
top for the
"navigator." The first time we
tried it out was on a 80
mile organized ride. It was very nice
having the map and directions handy since we
were on unfamiliar roads. |
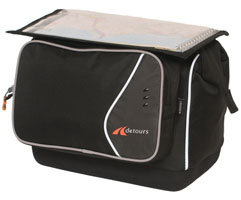 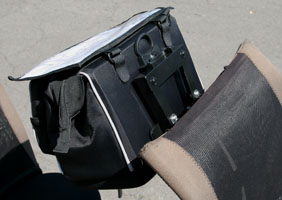 |
We carry all of our personal
items in it (wallets, phones, sunglasses, etc.).
When we stop for lunch or shopping, we just pop it off
the bike and
carry it with us using it's shoulder strap. I couldn't
find a bag like this that was designed
to fit on a recumbent. This is actually a
handlebar bag for an upright bike, the "Cruiser" made by
Detours.
Most such bags were way too big for our needs. This one is
just perfect. I did have to fabricate a way to
mount it on our bike. |
|
|
|
|
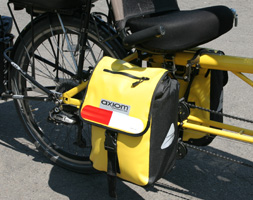
Panniers |
| Our next addition was
a set of small panniers under the stoker's seat.
We purchased both the rack and
panniers from
TerraCycle.
They
make underseat racks to fit most brands of recumbents.
The size of the
Axiom
"Monsoon" panniers are perfect.
The hooks that attach them to
the rack are located near the top of the bag so
they fit
nicely under the seat and you can still get into the bags
while they're mounted on the bike. These bags will
also help us keep our center of gravity low. |
 |
|
(pannier rack - shown with seat removed) |
|
|
|
|
Cargo Trailer |
 |
We spent
a lot of time debating: "trailers vs.
panniers" and "single vs. double wheel
trailers." On the pannier debate we
reached the conclusion that it would be very
difficult to physically locate enough panniers
on a tandem recumbent bike to haul the necessary
gear for two people on a long trip. That led us to
trailers. The major advantage of two
wheeled trailers are their stability.
However we ended up choosing a single wheel
trailer, primarily because I didn't like the width of
the two wheeled cargo trailers. On many roads, in order to keep the right
wheel out of the gravel, you'd need to ride
farther left out toward the traffic than I
wanted. We chose
a BOB
trailer that we purchased online from the
Bike
Trailer Shop. |
|
We like the low center of gravity of the BOB,
and the way it tracks perfectly behind the
bike's rear tire. Numerous times on our trips
we've encountered very narrow shoulders and
sections of poor pavement. I was glad I only
had to find a clear path for one tire (since all
three tires are inline)! The negative side
of a single wheel trailer is that as you ride,
you are balancing the weight of everything in
your trailer in addition to the riders. This is
especially an issue when grinding it out at 5mph
up steep hills. So, if I had to do it over
again what would I do? I would likely
still choose the single wheel trailer. However,
there is an alternative that I would consider.
That is a custom narrow two wheel trailer.
I have not seen one on the market that is both
narrow enough for me, while at the same time
large enough to haul all our gear. By
making a trailer narrower (no wider than the
handlebars) and longer (to increase capacity) I
think you might have a winner. It would
have some of the advantages (and yes
disadvantages) of both the single wheel and
standard two wheel versions... in theory.
:)
We did make a few modification to the standard
BOB trailer. We added a pannier rack over the
tire. It's one designed to fit the 16
inch tire of a Greenspeed trike. It just
takes a little bit of fabricating to make it
work. These panniers are the
Axiom
"Typhoon," they're a little larger than
the ones we use under the seat. I also added the rear
fender from a Greenspeed trike. The stock
fender didn't have the full coverage of the tire
that I wanted.
NOTE: It is recommended that
you only put bulky lightweight items in these
panniers so as not to alter the proper weight
balance of the trailer. We use them as the
"stuff sacks" for our sleeping bags. The
heavier gear goes in the main compartment of the
trailer. I should also say that the
soft-sided cooler (on top of the pack) is very lightweight
and is usually empty while traveling. We
take it along so we can stop at a store shortly
before arriving at each day's campsite and
purchase food items. On really hot days
it's also nice to be able to carry some ice to
add to our water bottles! |
|
|
|
Solar Power |
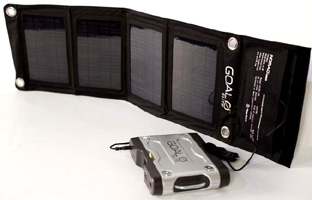 |
If you think you see a solar panel
in above picture of the bike trailer,
you're right. Yes, we
added solar power to our touring rig.
We carry a lot of items that consume
power: cell phones, cameras, bike
lights (using rechargeable AA batteries), a
laptop computer (for editing & posting
photos), and a Kindle. In our
travels we appreciate that many
campgrounds provide "hiker / biker"
areas that are set aside for travelers
arriving on foot or by bike.
However, those spaces do not
usually have electricity. Keeping
everything charged while traveling can
be a problem.
We investigated solar, and chose the
"Sherpa 50" kit from
Goal
Zero. Actually that system is a bit
undersized for our power needs, but the
next larger system added more weight
than I wanted to carry.
This works but I have to carefully monitor
our power usage. |
|
|
|
|
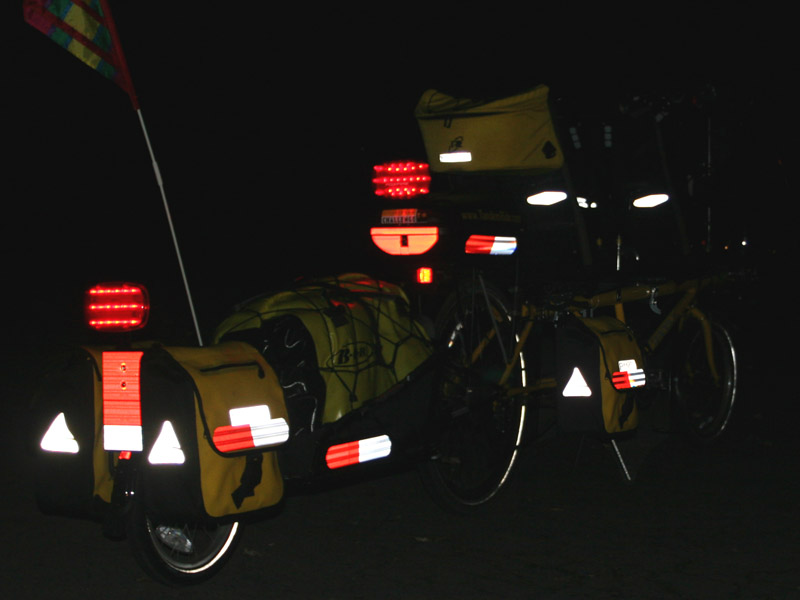
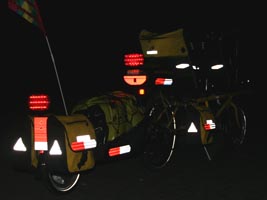
Reflectors |
| You may have
noticed in the pictures above that we
went crazy with reflectors! You can never be 100 percent
safe on the roads no
matter what you do. I just want to
make sure that I have done absolutely
everything in MY power to be as visible
to motorists as I possibly can.
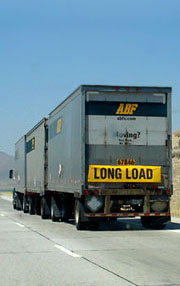
My inspiration was the number of reflectors on commercial
trucks. All
those red and white reflector strips on trucks are required by the
Department of Transportation. I
purchased the same DOT
approved reflectors, cut them down to
size a bit and placed them in several
locations on our rig. After all,
our bike is the semi-truck
of the cycling world. The picture
to the right was taken at night with
only the flash on the camera to
illuminate the reflectors. I talk
about our choice of lights on our
accessories page. I also added a
rear light on the trailer. |
 |
|
|
|
|
|
Flag |
|
One other detail we added was a new flag. You can
see it in the picture on top of this page. We
wanted something more interesting than the standard one
that came with the trailer. We found some really
cool flags from
South Winds /
Air Arts. It looks
cool and adds one more little piece of visibility. |
|
|
|
Camping Gear |
|
We have chosen our equipment from the "backpacking"
category of several different outdoor equipment
companies (REI,
Moosejaw &
Campmor). Our
goal is the same as a backpacker, gear that weighs as
little as possible and takes up as little space as
possible. After a whole lot of research, the items below are some of what we
picked. |
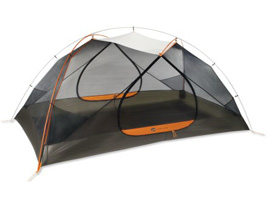 |
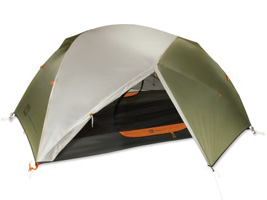
Obviously a tent is one of the major
items for camping. Our choice was
the "REI Quarter Dome T3 Plus." It is
listed as a three person tent, with the plus
referring to longer than standard. (Note:
the people who say a sub-compact car seats 4
adults, also rate the size of tents!) In order to have
sufficient room for both of us and some of our
gear, this size has ended up being perfect!
It is relatively light for it's size and is easy
to set up. |
|
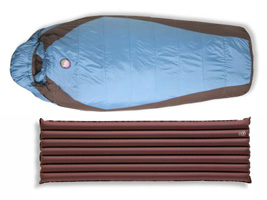
| We debated long and
hard as to our choice of sleeping bags. We
settled on synthetic rather than down even
though it is slightly heaver. We liked the
idea that even if wet, it maintains some
insulation value. The brand we picked is
"Big Agnes." They have a pocket in the
underside to hold the pad, so you don't
move off it during the night. The pad
is also one of theirs. We chose an
"Exped Air Pillow" that is quite comfortable and
packs very small. |
 |
|
 |
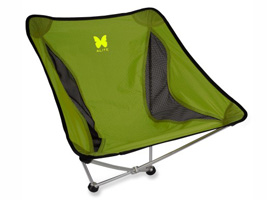
Here are a couple cool items. Once we set up camp, we wanted something to sit on.
But most
camp chairs weigh 8 pounds or more... out of the
question! This one is called the "Alite
Monarch Butterfly Chair." It weighs only 18oz.
and is very comfortable! The second item
is the "Tek-Towel" by "Sea to Summit."
It's like a "Sham-Wow" for your body. It's
a full size bath towel that takes up very little
room, sucks up water quite well, and dries fast. |
|
|
Personal Note: Prior to entering
into the world of bike touring, we had never been
campers. In fact I don't think either one of us
had ever been tent camping! So in addition to the
"riding heavily loaded" aspect of touring, we were more
than a little bit hesitant about the camping side of
things! We thought long and hard, not wanting to
spend a ton of money on gear, only to find we really
didn't enjoy it. As it turned out, we loved it!
There is something exhilarating about traveling to a
location with only what you have carried with you, and
setting up your campsite. Our biggest concern was
sleeping comfort. After a long exhausting day on
the road, we wanted to make sure we ended up with a good
night's sleep. Our longest debate about equipment
centered on that issue. We are very satisfied with
our choice of sleeping bags and pads! Our bags are
not "mummy bags," but the more roomy rectangular bags.
The inflatable pad is very comfortable. They may
be a tiny bit heaver, but are well worth it when you
turn in for the night! |
|
|
 |
|
Ahhhhh... now this is what it's all about!!! |
|
|
|